Concrete
Why is exterior paint peeling? A field guide to finding the failed layer
Trace the failed layer, test the cause and measure the removal boundary before a commercial exterior repaint.
Direct answer
Exterior paint peels when a bond between layers fails or when the paint or substrate itself breaks apart. Find the failed layer by comparing the exposed surface with the underside of the detached paint, then use moisture checks, cleaning trials and adhesion tests to distinguish the likely causes. Measure the repair boundary after testing the surrounding coating, because visible peeling alone does not define how much paint must come off.
On this page
Why is commercial exterior paint peeling?Failure-plane photo atlas: what came away, and what stayed?What should you record before disturbing the coating?Moisture, chalk, contamination or incompatibility: which branch fits?How do you separate moisture damage from poor adhesion?Why does paint peel between coats or under eaves?How do you prove that a repair system is compatible?Which confirmation test fits each substrate?How far should removal extend, and what coating can stay?What conditions and waiting times prevent another failure?Worked failure-to-repair record: the Truman HomeField checklist: when is a repair zone ready?Sources, method and how to cite this pageOpen the related tool for the calculation, checklist, or packet.
Why is commercial exterior paint peeling?
Exterior paint peels when a bond between layers fails or when the paint or substrate itself breaks apart. Find the failed layer by comparing the exposed surface with the underside of the detached paint, then use moisture checks, cleaning trials and adhesion tests to distinguish the likely causes. Measure the repair boundary after testing the surrounding coating, because visible peeling alone does not define how much paint must come off. [S1] [S5] [S6]
Poor adhesion describes a failure; it does not explain it. Water, chalk, contamination, a glossy interface, weak weathered material and unsuitable application conditions can coexist. [S1] [S9] [S13]
This guide diagnoses existing architectural finishes on walls, trim and canopies, from fracture identification through repair boundaries and the trial coating system. Use the [industrial protective coatings and abrasive blasting guide](/field-guides/concrete/industrial-protective-coatings-blasting/) for industrial preparation and inspection; roof-coating forensics is a separate task.
Failure-plane photo atlas: what came away, and what stayed?
Photograph the exposed surface and the underside of its detached fragment under one location ID. Establish the paint-disturbance controls below before collecting samples. Anvilfield’s six observation classes separate the fracture location from its proposed cause.
Start with an elevation view, then photograph the defect boundary, exposed face, chip underside and chip edge. Include a scale and direction labels. Describe layers by observed color and sequence; a white layer is not automatically primer, and color does not identify resin chemistry.

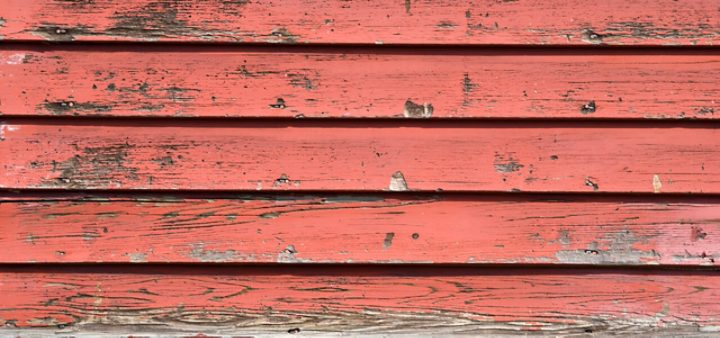
Complete these surface references with the exposed-face and chip-underside pair from the job; classify both faces using the table.
| Record | Exposed surface | Underside/edge of detached film | Plane to record | Next confirmation | Basis |
|---|---|---|---|---|---|
| A | Bare wood; examine grain and end joints | Paint stack without obvious fibers | Coating/wood interface | Compare moisture and preparation at defect, edge and reference | [S1], [S2], [S11] |
| B | Intact older coat exposed | Newer color layers; no substrate | Intercoat | Clean/dull a trial area; compare coating histories and patch response | [S1], [S3], [S9] |
| C | Broken coating visible on wall | Corresponding coating material on chip | Cohesive coating failure | Check film build, brittleness, cure and cross-section if needed | [S5], [S6], [S13] |
| D | Fuzzy, fractured or friable wood | Wood fibers carried away with paint | Cohesive wood failure | Probe soundness; remove degraded surface or replace damaged material | [S1], [S13] |
| E | Sandy or friable masonry | Mineral particles attached to paint | Suspected surface-layer failure; distinguish loose residue from fractured substrate | Separate loose surface material from sound concrete; select concrete pull-off method | [S6], [S7], [S9] |
| F | Exposed architectural metal, with rust or white corrosion deposits | Paint with attached corrosion products | Record coating/metal and corrosion-layer separation separately | Establish metal type; clean trial area and test remaining coating | [S5], [S9], [S10] |
Read the fracture before naming the cause
A clean-looking wood face identifies where separation occurred but cannot distinguish wetting from poor preparation. An intact older coat beneath a detached newer coat points to intercoat separation; matching fractured coating on both faces points toward cohesive failure. Fibers, mineral grains and corrosion products carried by the chip direct attention to the supporting material. [S1] [S5] [S6]
Preserve the weather-facing orientation of each fragment. Mark a fresh break created during collection separately from the original detached face, and record mixed planes as mixed.
Caption each pair with substrate, plane, date and cause-confirmation status. Retain the unwashed sample with its location record.
What should you record before disturbing the coating?
Record the address, elevation, exposure, component and substrate before washing or scraping. Add documented coating products and dates, recurring repair boundaries, cleaning history, the last wetting event and relevant indoor moisture sources. Preserve a detached chip before cleaning removes residue that could explain the separation. [S1] [S2]
For every instrument reading, record make, scale, material setting, check or calibration, units and exact location. Include temperature correction and probe depth where relevant. A number without its material scale cannot serve as a cross-substrate acceptance limit.
Photograph gutter overflow, deposits, open joints and penetration defects in relation to the peeling. Use the [siding installation guide](/field-guides/roofing/siding-installation-vinyl-fiber-cement/) for drainage behind cladding and the [fascia, soffit and eave trim guide](/field-guides/roofing/fascia-soffit-eave-trim-installation/) for damaged eave assemblies.
Resolve lead-paint requirements before cutting, scraping or sanding
EPA’s March 2026 Small Entity Compliance Guide, EPA-740-K-26-003, requires firm certification and lead-safe practices for covered paid renovations in pre-1978 housing and child-occupied facilities, including qualifying commercial spaces. Its exterior minor-repair exclusion covers 20 square feet or less of disturbed paint, with window replacement, demolition and prohibited practices excluded from that exception. Count the job’s disturbance, including test spots; the exclusion is not an exposure limit. Applicable state and local requirements also govern the work. [S15] [S16]
EPA does not require lead testing when the work is performed under applicable RRP requirements; a lead-free determination used to exclude components must follow EPA’s accepted methods and tester qualifications. OSHA 29 CFR 1926.62(a), (d)(1) and (d)(2), checked November 5, 2026, separately address occupational lead exposure in covered construction, including painting and repair: the employer determines exposure and provides applicable interim protections during assessment. Include sampling, dust controls and repair of test spots in the scope; use the [lead-safe renovation guide](/field-guides/concrete/lead-paint-rrp-renovation-safe-work/) for the work process. [S15] [S21]
Moisture, chalk, contamination or incompatibility: which branch fits?
Follow every branch supported by the paired observations. Water-damaged wood and chalk-weakened intercoat bonds can coexist. Anvilfield’s decision tree combines NPS and manufacturer guidance. [S1] [S2] [S3] [S9] [S13]
- Unsound material attached to the chip? Wood fibers, loose mineral material or corrosion products activate the substrate branch. Establish sound material and the repair scope before choosing a coating. Otherwise, identify the surviving coating interface.
- Does failure follow water? A leak path, damp zone, rainfall-linked recurrence or blister activates the moisture branch. Trace the source and repeat comparable observations after correction. One dry visit does not reconstruct earlier wetting.
- Does powder transfer from old paint? Investigate chalk, then distinguish it from crystalline masonry salts and deposited dirt. Clean a trial and reassess the remaining surface before moving to a repair patch.
- Is the failed interface sheltered, glossy or contaminated? Protected soffits, grease, salts and polish activate the preparation branch. Use substrate-compatible cleaning and dulling, then test the actual proposed coating system.
- Does the new coat lift, wrinkle or detach older paint? Compare product history, recoat intervals, film build, surface temperature, condensation and drying weather. Cold conditions or rapid drying can impair film formation without chemical incompatibility. Use another controlled patch or material analysis when layer identity changes the removal decision.
- Is the cause still unresolved? Record “plane identified, cause unresolved.” Target the remaining question with additional sampling or laboratory analysis before releasing that repair zone. Do not replace conflicting evidence with an instruction to coat over it.
| Observation | Evidence to compare | What it supports | Next decision | Basis |
|---|---|---|---|---|
| Raised blisters, then peeling | Opened blister plane, moisture history, sunlight and coating type | Heat/solvent effects and moisture are competing explanations; a blister alone does not select one | Trace wetting and application conditions before selecting preparation | [S1], [S18], [S19] |
| Cracks through the whole stack | Chip cross-section, crack depth and substrate movement | Old brittle film or material movement; superficial crazing and deep alligatoring need different removal | Remove failed depth; repair an unsound or moving substrate separately | [S1], [S13] |
| Powder without detached film | Transfer from old paint versus deposits on exposed masonry | Chalking, salt deposits and deposited dirt need different confirmation | Clean a trial, identify the residue and retest remaining paint | [S8], [S9], [S13] |
| Dark growth or stains | Surface contamination, leak path, wood condition and whether film is still bonded | Staining alone does not establish an adhesion failure | Clean by the approved system; repair wetting or unsound wood where present | [S1], [S2], [S10] |
| Failure first noticed after washing or repainting | Before/after photographs, wash method, fracture plane and repair history | Washing can expose weak old paint or damage the face; new-coat drying stress can detach weak older layers | Separate pre-existing weakness from newly damaged material before pricing repair | [S1], [S13], [S20] |
Early failure calls for application records; recurrence after rain calls for wetting observations; failure within a previous repair calls for its preparation history. Compare sheltered soffits, sunny faces, splash zones and humid-interior walls separately. [S1] [S2] [S13] [S19]
How do you separate moisture damage from poor adhesion?
Read the fracture plane, distribution and moisture history together. Moisture can weaken a bond and swell wood, so “moisture” and “poor adhesion” are not mutually exclusive diagnoses. NPS Preservation Brief 39, October 1996, supports tracing and monitoring the moisture source instead of treating only its visible symptom. [S1] [S2]
Anvilfield’s comparative protocol uses failed locations, their perimeters and apparently sound references on the same material and exposure. Repeat readings at the same marked positions after rain and during drying.
Use the meter’s instructions for its material scale and known interferences. Do not report a masonry relative index as wood moisture percentage. Reconcile an anomalous reading with another observation before drawing a repair boundary. A dry reading during the visit does not exclude earlier rain entry or concealed wetting.
Trace [roof-to-wall flashing](/field-guides/roofing/roof-flashing-types-overview/), parapets, penetrations, end grain and splashback. Check [gutters and downspouts](/field-guides/roofing/gutter-downspout-exterior-drainage/) and leaking [concrete joints](/field-guides/concrete/concrete-joint-sealant-replacement/). For render or insulated cladding, establish whether the defect belongs to the finish or the [stucco/EIFS wall system](/field-guides/concrete/stucco-eifs-exterior-wall-systems/). [S2] [S11]
Use moisture tests within their scope
ASTM D4263-24 indicates capillary moisture in concrete; it does not supply a percentage moisture-content result or a whole-wall repaint clearance. Sherwin-Williams’ undated surface-preparation guidance describes an 18 by 18 inch, 4 mil plastic sheet sealed at every edge for at least 16 hours, followed by inspection for moisture, discoloration or condensation. Use that manufacturer procedure as a moisture screen alongside the wetting history. [S7] [S9]
A positive indication requires locating and correcting the moisture source before that manufacturer’s repaint procedure. A negative indication still needs the site history and selected coating requirements. Do not turn a slab RH criterion, a wood reading or the generic page’s unqualified concrete percentage into an exterior-wall acceptance limit.
D4263 addresses concrete. Identify brick, CMU, stucco and EIFS separately and choose their system-appropriate investigation; a plastic-sheet screen on another material is not automatically D4263 compliance. Initial masonry pH and moisture acceptance are substrate-preparation questions, separate from locating the failed layer. [S7]
Why does paint peel between coats or under eaves?
Shelter from rain can preserve contamination. Sherwin-Williams’ undated intercoat-peeling guidance identifies pollutants and salts accumulating under eaves and porches where natural washing does not occur, along with hard glossy films and inadequate preparation. A protected soffit therefore needs a cleanliness investigation even when there is no active leak. [S3]
Check chalk, contamination and weak old films separately
Chalk is degraded coating residue; efflorescence is a mineral deposit associated with moisture transport in masonry. White powder alone does not identify either one. Use the substrate, residue location, history and cleaning response together. [S1] [S2] [S13]
ASTM D4214-23 evaluates exterior-paint chalk through transfer and specified comparisons. A casual hand wipe is a screening observation, not a standardized rating, and a chalk result is not bond strength. Agree any repaint acceptance criterion for the selected system. [S8]
Cleaning can remove contamination without restoring a weak underlying layer. Recheck the prepared surface and, if the repair patch detaches, identify its new fracture plane. Use product records or analytical identification when chemistry changes the repair choice; a solvent rub alone does not identify the whole coating stack.
Oil/alkyd and latex/acrylic labels alone do not settle compatibility. A new coat can stress brittle older films, and a bonding primer still relies on every retained layer beneath it. Demonstrate the actual prepared system instead of applying a blanket rule based on the apparent age or binder of the old paint. [S1] [S9] [S10] [S13]
How do you prove that a repair system is compatible?
Allow the A-100 repair test area to dry one week before checking adhesion, according to Sherwin-Williams’ December 2024 A82-Series sheet; a different coating system needs its manufacturer’s test-cure instruction. That wait is for examining the trial, not the interval between finish coats. [S10]
Sherwin-Williams’ undated preparation page calls for a compatibility patch covering at least 2 to 3 square feet. Use the proposed cleaning, abrasion, primer and finish sequence. Anvilfield’s patch layout includes a retained-coating edge and bare-area repair where practical, with substrate, products, batches, thinning, conditions and application dates recorded. [S9]
Inspect the trial for lifting, wrinkling, persistent softening and edge detachment, then test adhesion after the specified cure. Photograph both faces of any new fracture. A trial that lifts an older layer expands the removal question even if the new paint remains bonded to that layer.
When comparing preparation options, keep the coating system and exposure alike and record the preparation difference. Write the acceptance method, required rating or strength where specified, and acceptable failure modes into the trial record before testing. Keep the approved preparation sequence available to the crew. ASTM D7234-22 recommends sufficient cure to develop strength and directs the coating manufacturer to supply the minimum test-cure interval, extended for site conditions when needed. [S6]
Where manufacturer instructions and test standards differ
Resene’s undated diagnostic tape check pulls at right angles to the surface; ASTM D3359-23 describes tape removal as close to 180 degrees as possible. Identify the former as a manufacturer screening check, not an ASTM result. Their outcomes are not interchangeable ratings. [S4] [S13]
Sherwin-Williams’ generic page references D3359 on concrete; ASTM scopes it to relatively ductile coatings on metal, with no corresponding precision/bias support for wood or plastics. Agree and record the screening method on nonmetallic surfaces; select D7234 when the question is concrete coating pull-off strength. [S4] [S6] [S9]
Identify factory primer, factory finish and later field coats on fiber cement before preparing the trial. James Hardie’s undated FAQ warns that pressure washing can damage its siding and recommends a low-pressure hose and suitable soft brush for routine cleaning. The generic Sherwin-Williams cement-siding instruction of at least 2,100 psi is not a default for that cladding: reconcile the identified cladding and coating requirements before repair preparation. [S9] [S20]
Which confirmation test fits each substrate?
Choose a test to answer a specific question: whether moisture is present, residue remains, an interface is weak or a specified tensile criterion is met. Record the result, unit, failure mode and configuration together. Use the complete specified ASTM edition for test execution, including tape selection, cutting or fixture preparation, loading and reporting. Tape classifications are not tensile strength, and neither test predicts remaining service life. [S4] [S5] [S6]
| Substrate/condition | First confirmation | Instrument or method | Result and decision | Limit | Source |
|---|---|---|---|---|---|
| Wood siding or trim | Paired moisture observations and soundness check | Material-appropriate meter; probe and chip examination | Correct wetting; remove weakened fibers or replace unsound wood; retest dry prepared area | Compare readings on the same material scale; meet selected coating requirements | [S1], [S2], [S9] |
| Fiber cement | Check for friable face, joint wetting and separation from factory finish | Matched observations; manufacturer-approved preparation and patch | Distinguish face damage from coating separation; correct water path before patch | Identify factory versus field finish; use cladding-compatible cleaning | [S9], [S14], [S20] |
| Exposed concrete with suspected moisture | Indicate capillary moisture on the concrete | D4263-24 scope; [S9] plastic-sheet procedure | Locate the source; resolve wetting and review coating-system requirements | Not RH, moisture percentage or a whole-wall clearance | [S7], [S9] |
| Brick, CMU, stucco or EIFS | Establish the material, deposit/finish condition and water path | Material/system-appropriate investigation and repair trial | Separate finish failure from friable masonry, render or wall-system damage | Concrete test scopes do not automatically extend to every masonry or EIFS assembly | [S2], [S7], [S9]; scope interpretation |
| Coated concrete with strength question | Locate weakest plane under tension | ASTM D7234-22, instrument and loading fixture recorded | Record strength plus coating, glue or substrate failure; compare agreed criterion | Cure and substrate strength affect result; destructive spots require repair | [S6] |
| Coated architectural steel/aluminum | Screen adhesion or quantify pull-off as specified | D3359-23 tape; D4541-22 pull-off | Record tape method/thickness or pull-off method/protocol and fracture plane | Different tests and instruments are not interchangeable | [S4], [S5] |
| Galvanized architectural metal | Check contamination/treatment and remaining film | Actual-system patch plus agreed adhesion method | Clean, remove corrosion and test before retaining finish | Product-specific preparation controls; no automatic six-month weathering rule for every system | [S9], [S10] |
| Vinyl with failing field paint | Establish substrate/paint condition and product history | Siding-compatible cleaning and coating patch | Check heat and color suitability using the siding guide | No scratch/pull-off procedure generalized to flexible panels | [S4], [S14] |
| Chalking old paint on any appropriate exterior substrate | Determine residue and degree | ASTM D4214-23 if a standardized rating is required | Clean and reassess before repair patch | Chalk test is not bond strength | [S8] |
Tape-test numbers that matter
ASTM D3359-23 primarily assigns Method A to total films greater than 125 micrometers (5 mils) and Method B to films less than that thickness; thicker Method B work requires wider cuts and explicit purchaser/seller agreement. Establish thickness and agree the method, including the boundary case, before testing. [S4]
ASTM D3359-23 rates tape-test adhesion on a 0 to 5 scale rather than in psi or MPa, and intercoat separation can leave adhesion to the substrate untested. Intermediate ratings are not used; the method distinguishes relatively large adhesion differences. [S4]
Pull-off numbers need a fracture description
ASTM D4541-22 distinguishes test-to-fracture Protocol 1 from pass/fail Protocol 2 for metal-based pull-off work. Record the instrument method and protocol. The standard also allows consideration of other rigid substrates, including wood and plastic, when the user/specifier addresses loading rate and flexibility; that is not automatic suitability for thin siding. [S5]
ASTM D7234-22 evaluates pull-off strength of coatings on concrete, with the fracture surface identifying the weakest plane among the fixture bond, coating system and substrate. A glue-limited result does not establish ultimate coating bond strength; cohesive concrete failure identifies a different weak element from intercoat separation. [S6]
Preserve location, cure age, fixture, glue, scoring, instrument and fracture photograph. Apply the specified validity and acceptance procedure to decide whether a test needs repetition. Compare like configurations and planes; averaging unrelated failures into one large number hides what the tests actually loaded. Set the project/system acceptance criterion before testing instead of inventing a universal minimum rating or psi value. [S5] [S6]
How far should removal extend, and what coating can stay?
Sherwin-Williams’ undated intercoat-peeling guidance recommends checking adhesion 6 to 12 inches beyond peeled coating; that distance defines a test zone, while the weakness found defines the removal boundary. Extend the survey whenever the same weak plane continues beyond that zone. [S3] [S11]
Anvilfield’s survey protocol separates each substrate, exposure and coating history into a mapped zone. Start each zone with failed locations, perimeter checks and apparently sound comparisons; include high, low, sheltered and weathered areas where present. Agree test counts and acceptance criteria before testing, then expand sampling where results conflict or weakness continues. Map every test. Carry unsurveyed area as pending, then assign it to removal or retention before finalizing quantities. Resene warns that a tape result describes only the spot tested; one satisfactory location cannot qualify an untested elevation. [S13]
Retain sound, clean coating that the preparation and repair-system trial demonstrate is compatible. Remove to sound material where a weak layer remains. Condition and trial performance decide whether a larger removal area is necessary, rather than a universal percentage of peeling. A finish coat carried to a corner for appearance does not make the entire elevation a stripping quantity. [S1] [S9] [S10]
| Quantity | Measurement and unit | Include | Keep separate | Release evidence |
|---|---|---|---|---|
| Net coating face | Gross developed face less openings/nonpainted surfaces, sq ft | Actual wall/trim faces | Floor area and roof footprint | Marked elevation takeoff |
| Coating-removal footprint | Union of stripping and substrate-replacement polygons, sq ft | Visible failure plus tested extensions and unsound substrate | Duplicate overlaps and finish-only area | Test IDs and photographed sound boundary |
| Substrate replacement | Developed face, board lengths/counts, or repair volume | Unsound material identified after exposure | Sound material needing only coating prep | Repair inspection and water-source correction |
| Bare-area primer | Actual prepared bare area, sq ft | Primer required by selected system | Retained finish receiving a different tie coat | Primer/system sheet and substrate record |
| Retained old coating | Net face less the union of stripping and replacement zones, sq ft | Qualified existing coating | Untested visually intact areas; duplicate replacement deductions | Prepared-area tests and compatible patch |
| Finish coverage | Area per coat, sq ft-coats | Chosen finish boundary times actual coat count | Primer and stripping quantities | Product spread rate, texture and coat specification |
| Access and containment | Mobilizations, lift/scaffold days and protected area | Work platform, occupancy protection, debris capture | Paint material gallons | Site/access and coating-hazard plan |
These quantity categories are Anvilfield’s estimating protocol. Count shared polygons once within each operation, then keep the operation ledgers separate: the same face can legitimately require stripping, primer and finish. Retention subtracts the union of stripping and replacement, so replacement inside an already mapped repair zone is not deducted twice.
Worked repair-zone quantity reconciliation
Anvilfield estimates a 252-square-foot coating-removal footprint, comprising 232 square feet of stripping and 20 square feet of substrate replacement, with 1,748 square feet of retained coating on the 2,000-square-foot face below; all 2,000 square feet receive the scheduled finish coats.
Add the two tested repair areas and subtract their shared area to find the removal footprint. Then subtract that footprint from the defined coating face to find retained old coating.
| Operation/input | Calculation in sq ft unless shown | Quantity or scope result |
|---|---|---|
| Physical coating face already defined | Estimate input, after openings and returns; retained zones qualified by the agreed checks | 2,000 sq ft |
| Visible peeling within Zone A | Estimate input | 120 sq ft |
| Zone A after surrounding tests | 18 ft by 10 ft | 180 sq ft |
| Zone B after surrounding tests | 12 ft by 8 ft | 96 sq ft |
| Overlap between A and B | 6 ft by 4 ft | 24 sq ft |
| Coating-removal footprint, stripping or substrate replacement | Add A and B; subtract their overlap: 180 + 96 - 24 | 252 sq ft |
| Substrate replacement within A, identified before stripping | 4 ft by 5 ft, already inside removal footprint | 20 sq ft; not another area deduction |
| Existing material to strip and retain as substrate | 252 - 20 | 232 sq ft |
| Retained old coating | 2,000 - 252 | 1,748 sq ft |
| Bare-area primer where the selected system requires it | 232 stripped + 20 replacement | 252 sq ft |
| Two finish coats across the defined face | 2,000 sq ft times 2 coats | 4,000 sq ft-coats |
Method: Anvilfield estimates rectangular repair zones from length times height and subtracts their shared rectangle once. Replacement identified before stripping is a subset of removal, so it reduces stripping-only scope. Bare-primer area follows the selected system, while full-face finish is a separate operation. Zone A grows from 120 to 180 square feet after surrounding testing, adding 60 square feet before Zone B is reconciled.
What conditions and waiting times prevent another failure?
Sherwin-Williams’ December 2024 A-100 Exterior Latex Satin sheet lists 24 to 48 hours to recoat in its 35 to 45°F band and 4 hours in its 45°F+ band at 50% relative humidity; Anvilfield uses the longer interval at the shared 45°F boundary. Benjamin Moore’s Aura Exterior Low Lustre 634 sheet, M72 634 US 062921, specifies a four-hour recoat at 77°F and 50% RH. [S10] [S14]
Touch-dry, recoat-ready and ready for an adhesion test are different states. Cool humid weather slows drying; strong sun and wind can dry the surface too quickly for sound film formation. Release the whole system against its primer and finish instructions, not the lowest temperature printed on the topcoat can. No fixed number of days after washing clears every substrate.
| Requirement | Sherwin-Williams A-100 Exterior Latex Satin A82-Series, 12/2024 [S10] | Benjamin Moore Aura Exterior Low Lustre 634, M72 634 US 062921 [S14] | Field implication |
|---|---|---|---|
| Application temperature | Air, surface and material above 35°F; do not apply if air/surface will fall below 35°F within 48 hours | Air/surface not below 40°F; stated surface range 40 to 100°F | Check the exact system, including primer |
| Metal exception | Large expanses of metal siding require air, surface and material at least 50°F | Listed metal preparation/primer system applies | A-100's 35°F headline does not cover that exception |
| Condensation/weather | At least 5°F above dew point; avoid application if rain/snow expected within 2 to 3 hours | Avoid direct sunlight; cool/humid conditions extend drying | Use each product’s own weather and condensation restrictions |
| Repair compatibility trial | Test area dry one week before adhesion test; repeat preparation and retest if poor | Clean, remove chalk/loose paint, dull gloss; prime bare repaint areas as directed by substrate schedule | Obtain the test-cure instruction for the selected Aura repair system |
| Bare-system example | Cedar/redwood: oil-based exterior wood primer plus 2 A-100 coats | Ordinary wood: 2 Aura coats; bleeding woods have listed primer options plus 2 finish coats | Follow the actual substrate-specific schedule |
Air temperature describes the surrounding air; surface temperature describes the face receiving paint. The [dew point](/field-guides/glossary/dew-point/) identifies the condensation threshold, while the forecast addresses conditions after application. Measure the surface being coated, including sheltered and colder locations, instead of relying on a weather-app air temperature. [S10]
The generic Sherwin-Williams concrete preparation page’s 50°F instruction and A-100’s lower topcoat application limit address different scopes. Resolve the complete system requirements before scheduling. Repeat moisture and cleanliness checks after wetting or contamination before releasing the prepared surface. [S9] [S10]
Worked failure-to-repair record: the Truman Home
NPS Preservation Tech Notes, Exterior Woodwork No. 2, September 1986, connects recurring water entry, concealed wood damage and measured removal work at the Truman Home. The project ran from October 1984 to November 1985. The table pairs NPS observations with Anvilfield’s scope decisions. [S12]
Deteriorated roofs and built-in gutters had repeatedly wetted the building. A poorly detailed sleeping-porch floor admitted rain into wall cavities, and more than 20 paint coats concealed deterioration. NPS reports removal of a majority of the exterior finish to bare wood in preparation for a three-coat application. [S12]
| Record field | Published observation or input | Scope decision or quantity | Provenance |
|---|---|---|---|
| Failure pattern | Severe cracking, alligatoring and peeling on exposed faces; moderate failure in protected locations | Separate condition by exposure before choosing removal depth | [S12] p. 1 |
| Failed supporting material | Paint layers concealed deteriorated woodwork and cladding | Expose and identify wood requiring repair or replacement | [S12] pp. 1 to 3 |
| Water evidence | Deteriorated roofs/built-in gutters; porch-floor water entered wall cavities | Include water-source and substrate repairs in the scope | [S12] pp. 1 to 2 |
| Removal decision | Majority of exterior finish taken to bare wood | Prepare for the specified primer and finish system | [S12] p. 2 |
| Siding removal | 5,800 sq ft | Wall-siding operation ledger | [S12] p. 6 |
| Porch deck removal | 1,000 sq ft | Separate horizontal deck ledger and coating system | [S12] p. 6 |
| Decorative millwork removal | 2,450 sq ft | Separate detailed-surface ledger | [S12] p. 6 |
| Named-area subtotal | 5,800 + 1,000 + 2,450 sq ft | Anvilfield estimates 9,250 sq ft across these three surface classes | Calculation from [S12] |
| Retention record | Majority removal documented; retained area not quantified | Record measured retained zones separately on a current job | [S12] |
Method: Anvilfield estimates the named-area subtotal by adding NPS’s three reported removal areas. Keep those surface classes separate when assigning preparation and finish operations. Reconcile window, door and other component work in their own ledgers.
Turn the failure record into a repair scope
Break the estimate into water-source repairs, substrate replacement, coating removal, primers or tie coats, finish coats, access, occupied-site protection, hazardous-coating work, testing and disposal. Assign quantities and responsibility to each line. Use a prepared trial to measure production on the actual material; detailed millwork and open siding require different labor allowances.
Carry stripping and replacement as separate operations. If damage is discovered after stripping, record completed stripping and added replacement explicitly. Reconcile their shared footprint once when calculating retained old coating, and document the revised scope before the crew continues.
The [architectural-paint demand guide](/field-guides/market-intelligence/architectural-paint-manufacturers-commercial-repaint-demand-from-building-stock/) addresses account planning. Organize exterior survey visits by business type, building size and access needs. Tie each visit to a separate elevation record so the next estimate starts from measured repair quantities. A contractor scheduling exterior paint surveys receives commercial building lists as CSV or Excel within 48 hours through [PorchRocket Ground Control](/groundcontrol?mode=commercial).
Field checklist: when is a repair zone ready?
Release source correction, substrate repair, retained coating and application conditions separately. The contractor records completed work; the owner/specifier accepts the specified scope and exceptions; the coating manufacturer supplies compatibility and cure requirements where these determine acceptance. A repaired leak alone does not prove the remaining coating is sound.
- Elevation, substrate and unique zone/test IDs recorded on the takeoff.
- Overall, close-up, exposed-face and chip-underside photographs saved before cleaning.
- Coating history and actual product sheets obtained, or unknown layers explicitly recorded.
- Applicable lead/coating-hazard and access controls established before disturbance.
- Failure plane recorded separately from proposed cause, including mixed planes.
- Water path corrected and follow-up observations support the repair.
- Substrate soundness established; defective material repaired or replaced.
- Chalk and contaminants removed with the approved preparation method.
- Surrounding coating tested beyond visible peeling; removal boundary revised to include confirmed weakness.
- Trial repair system and cure interval documented; agreed adhesion criteria satisfied.
- Stripping/replacement union reconciled with retained old coating; shared removal polygons counted once and primer/finish operation overlaps identified.
- Air/surface conditions and forecast satisfy each product in the applied system.
- Destructive test spots repaired; final coating products, batches, coats and application dates logged.
- Contractor's record, scope acceptance, exceptions and follow-up date handed to the owner.
Anvilfield recommends checking source repairs after the next relevant rain or wetting event, inspecting coating at the agreed cured-acceptance date, and revisiting recurring failures during routine envelope inspections.
Sources, method and how to cite this page
Anvilfield reviewed the sources on November 5, 2026. ASTM references here use the publisher’s public scope and significance statements; manufacturer requirements retain their actual product-sheet editions. Anvilfield protocols organize field observations and estimating decisions. The Truman Home areas are NPS-reported inputs; the area subtotal and repair-zone worksheet are Anvilfield estimates.
Update log, 2026-11-05: Source editions and requirements rechecked; source photo references, trial acceptance and survey coverage added; historical prices removed; repair quantities reconciled.
Cite a specific table by its fragment, such as substrate confirmation tests or repair-area calculation, and retain the source edition with any extracted rule.
How to cite this page: Anvilfield, Why is exterior paint peeling? A field guide to finding the failed layer, 2026, https://anvilfield.com/field-guides/concrete/exterior-paint-peeling-failure-diagnosis/
FAQ
Why is commercial exterior paint peeling?
A bond or material layer has failed; compare the exposed surface and detached film, then test moisture, contamination and compatibility.
Is peeling paint caused by moisture or poor adhesion?
Moisture can cause adhesion loss, so the fracture plane, wetting pattern and comparable moisture observations must be read together.
How do I diagnose exterior paint intercoat failure?
Compare an intact older coat on the wall with the underside of the detached newer film. Matching fractured material on both faces instead points to failure within a layer.
How should peeling paint be tested before repainting?
Match the test to the substrate and question: moisture indication, chalk evaluation, tape screening or specified pull-off testing.
Why does paint peel under eaves that stay dry?
Protected surfaces can accumulate contaminants and salts that rain does not wash away. Check cleanliness and the failed interface alongside any concealed wetting.
Can I paint over firmly attached old paint?
Retain it when preparation and the repair-system trial demonstrate sound, compatible coating.
How far beyond peeling should I check adhesion?
Sherwin-Williams recommends checking adhesion 6 to 12 inches beyond peeled coating. Extend testing and removal wherever the same weak layer continues.
Does a tape-test rating tell me bond strength in psi?
No; ASTM D3359-23 supplies a categorical adhesion rating rather than tensile bond strength.
How long should an exterior paint test patch dry?
A-100's December 2024 sheet specifies one week before adhesion testing; other systems need their own specified test-cure interval.
Does repainting fix moisture-related peeling?
Correct the wetting source and establish sound, suitably dry material before applying the repair coating system.
Will bonding primer stop old exterior paint peeling?
A primer relies on the layers beneath it; remove weak material and demonstrate the proposed repair system on the prepared retained coating.
Can pressure washing make exterior paint peeling worse?
It can damage the substrate as well as expose weak coating; use the identified cladding's approved cleaning and repair method, including James Hardie's low-pressure routine-cleaning guidance for its siding.
People also ask
Codes cited in this guide
This guide is written and reviewed against the published standards below. Always confirm the current adopted edition with the authority having jurisdiction.
Sources checked
- S1: NPS Preservation Brief 10, Exterior Paint Problems on Historic Woodwork, September 1982 Condition-led treatment, moisture, intercoat peeling, retention versus removal; historic-wood scope; checked 2026-11-05.
- S2: NPS Preservation Brief 39, Holding the Line: Controlling Unwanted Moisture in Historic Buildings, October 1996 Water-source tracing, comparative observation and monitoring; checked 2026-11-05.
- S3: Sherwin-Williams, Intercoat Peeling in Protected Areas, undated web guidance Sheltered contamination, salts, gloss; 6 to 12 inch surrounding adhesion check; checked 2026-11-05.
- S4: ASTM D3359-23, publisher public scope/significance; active edition displayed Metallic/relatively ductile coating scope, 125 micrometer method distinction, 0 to 5 ratings, peel angle and intercoat limitation; checked 2026-11-05.
- S5: ASTM D4541-22, publisher public scope/significance; active edition displayed Metal pull-off, protocols, weakest plane, equipment/configuration effects; checked 2026-11-05.
- S6: ASTM D7234-22, publisher public scope/significance; active edition displayed Concrete pull-off, failure mode, cure supplied by manufacturer, destructive test repair; checked 2026-11-05.
- S7: ASTM D4263-24, publisher public scope/significance; active edition displayed Capillary moisture indication on concrete, not a percent-content result; checked 2026-11-05.
- S8: ASTM D4214-23, publisher public scope/significance; active edition displayed Evaluation of exterior coating chalk by transfer and comparisons; checked 2026-11-05.
- S9: Sherwin-Williams Surface Preparation, undated web guidance Previously coated surfaces, patch size and one-week wait, plastic-sheet dimensions/time, substrate distinctions; checked 2026-11-05.
- S10: Sherwin-Williams A-100 Exterior Latex Satin A82-Series, 102.11A, December 2024; compliance date 12/17/2024 Temperature and metal exception, dew-point margin, forecast, recoat times, spread rate, priming, one-week test area; checked 2026-11-05.
- S11: Sherwin-Williams How to Fix Exterior Paint Peeling Caused by Moisture, undated web guidance Wetting paths, cause correction, surrounding adhesion check; checked 2026-11-05.
- S12: NPS Preservation Tech Notes, Exterior Woodwork No. 2, Paint Removal from Wood Siding, September 1986, PTN-18 Truman Home 1984-1985 failure observations, removal decision, surface-class areas and project photographs; checked 2026-11-05.
- S13: Resene Peeling, Paint and Decorating Problem Solver, undated web guidance Total-film versus intercoat failure, weak substrates, new-coat stress, location-limited screening and right-angle tape check; checked 2026-11-05.
- S14: Benjamin Moore Aura Exterior Low Lustre 634, M72 634 US 062921, June 29, 2021 40 to 100°F surface range, 4-hour recoat at specified conditions, coverage/film build, preparation and substrate priming; checked 2026-11-05.
- S15: EPA Renovation, Repair and Painting Program: Contractors, live guidance checked 2026-11-05 Covered pre-1978 work, firm certification, lead-testing qualifications and exterior minor-repair exclusion; checked 2026-11-05.
- S16: EPA Small Entity Compliance Guide to Renovate Right, EPA-740-K-26-003, March 2026 RRP scope, minor-repair conditions, certification and state/local applicability; March 2026 edition verified; checked 2026-11-05.
- S17: Sherwin-Williams Common Painting Issues, undated benchmark index Existing symptom-by-symptom benchmark; new page adds paired observations and measured repair boundaries; checked 2026-11-05.
- S18: Sherwin-Williams How to Fix Paint Blistering, undated web guidance Blistering has multiple causes; broad formula warnings must not replace a product-specific repair trial; checked 2026-11-05.
- S19: Purdue Extension NCR-133, Paint Failure Problems and Their Cure, HTML edition undated Heat versus moisture blistering, wetting patterns and cleaning before recoating; no universal modern drying or service-life values adopted; checked 2026-11-05.
- S20: James Hardie Frequently Asked Questions, Siding Care, undated live guidance Factory versus field finishes; pressure-washing damage warning and low-pressure routine cleaning; not a universal repair-pressure specification; checked 2026-11-05.
- S21: OSHA 29 CFR 1926.62, Lead, federal text checked 2026-11-05 Construction scope, exposure determination and interim task protections under 1926.62(a), (d)(1) and (d)(2); official OSHA page browser-read after curl 403; checked 2026-11-05.